SmartSpace Development Environment
How to start an instance
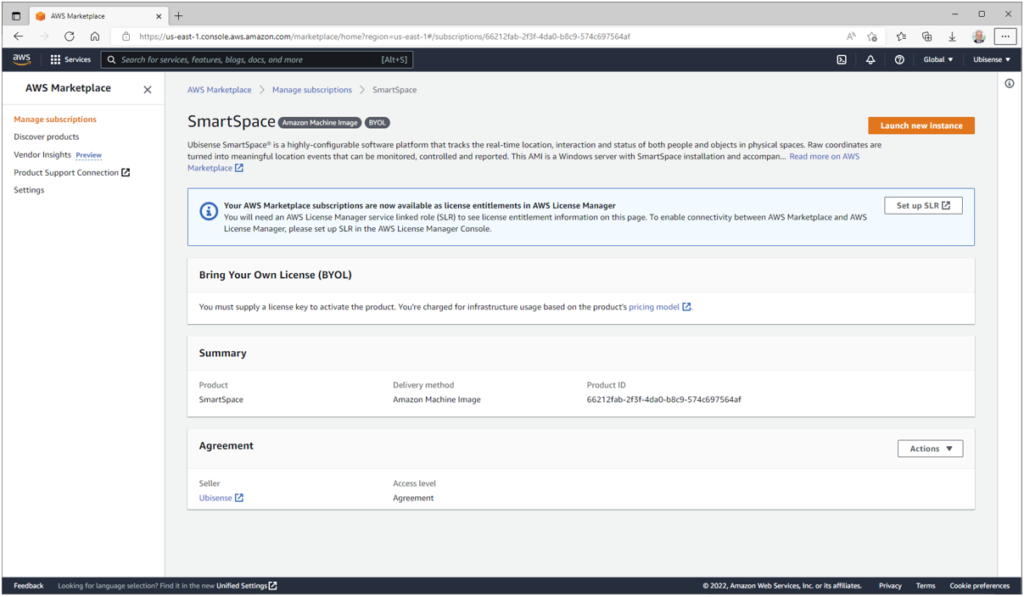
After selecting SmartSpace, you should see a page a bit like this.
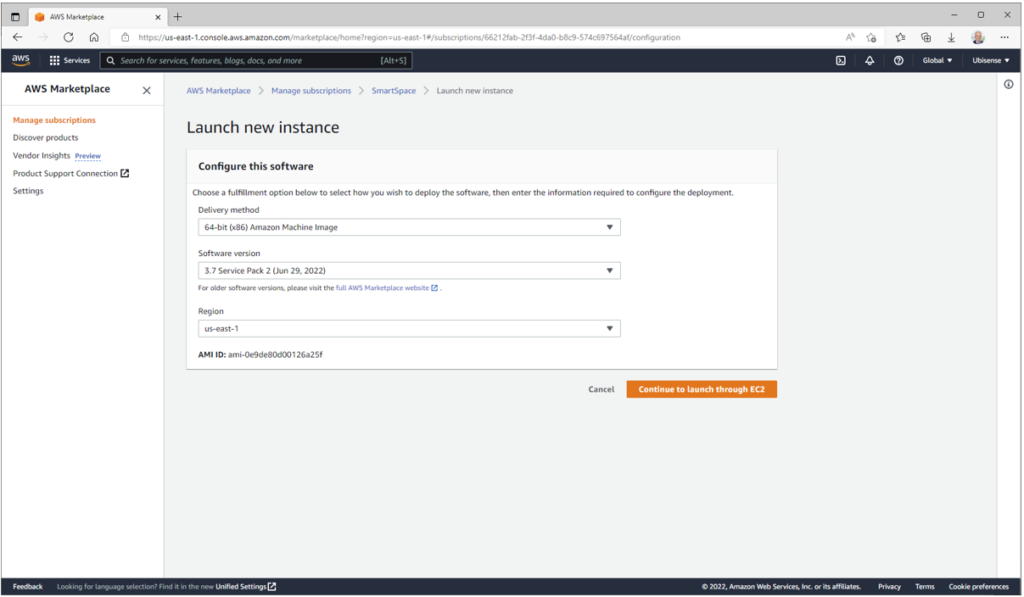
Pressing the ‘Launch new instance’ button will show a page like this. If you wish, you can select another region for your instance at this stage.
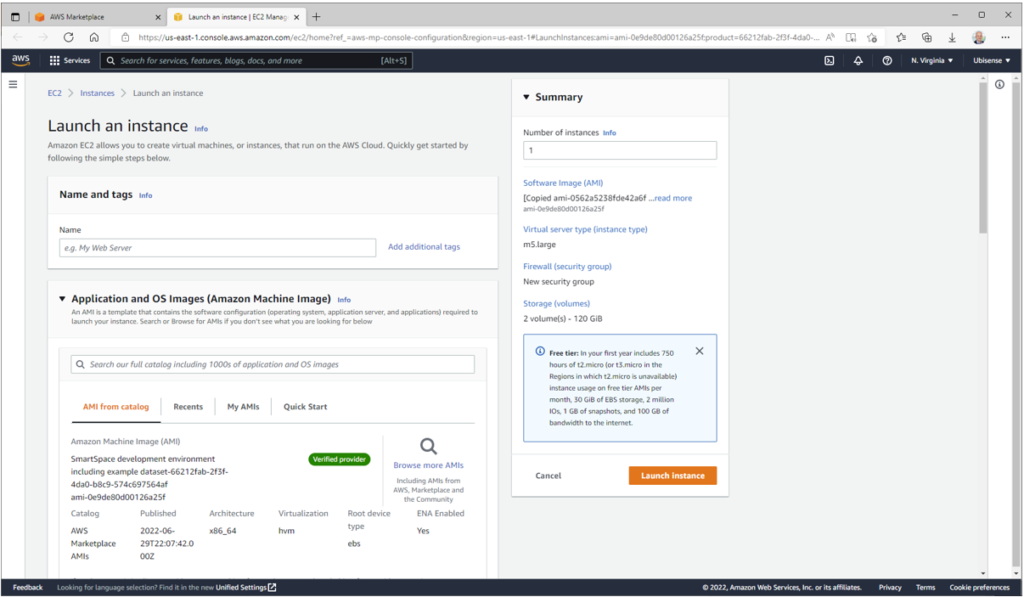
Pressing the ‘Continue to launch through EC2’ button will show a page like this
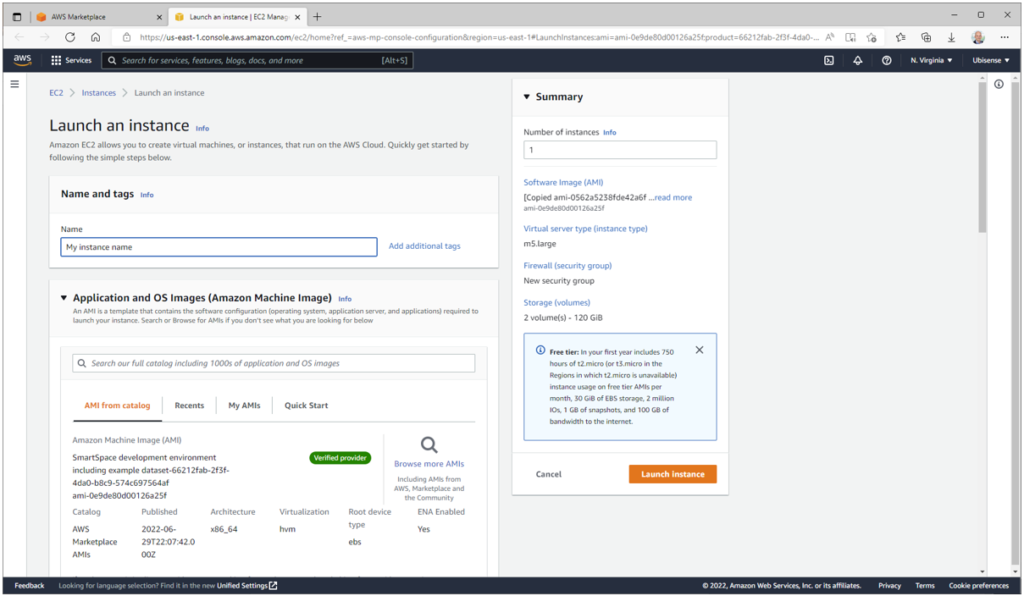
First give your instance a name:
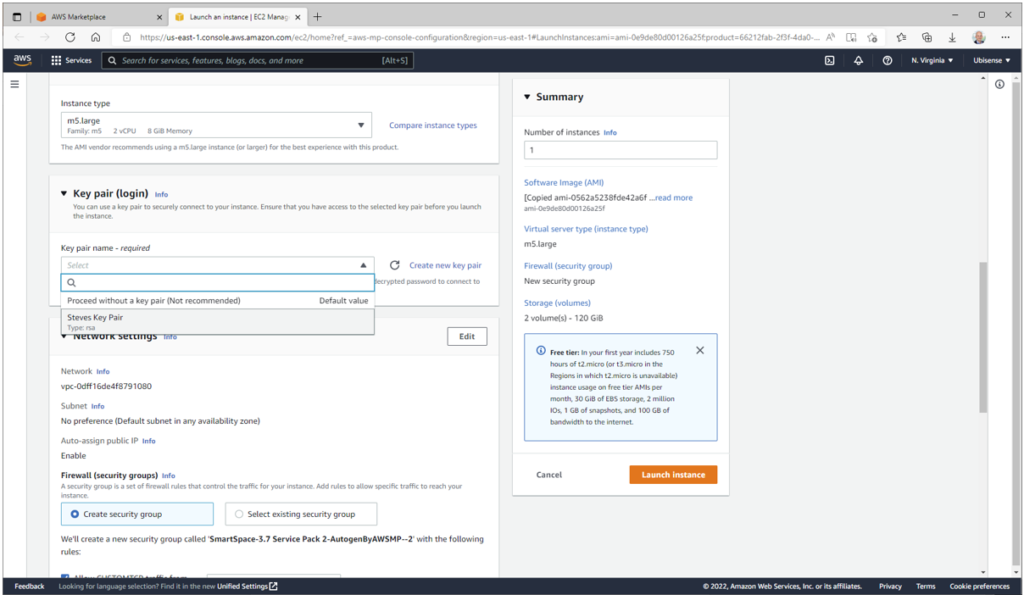
Then select a key pair to control access to the instance (see Create key pairs – Amazon Elastic Compute Cloud for instructions on how to create a key pair if you don’t currently have any):
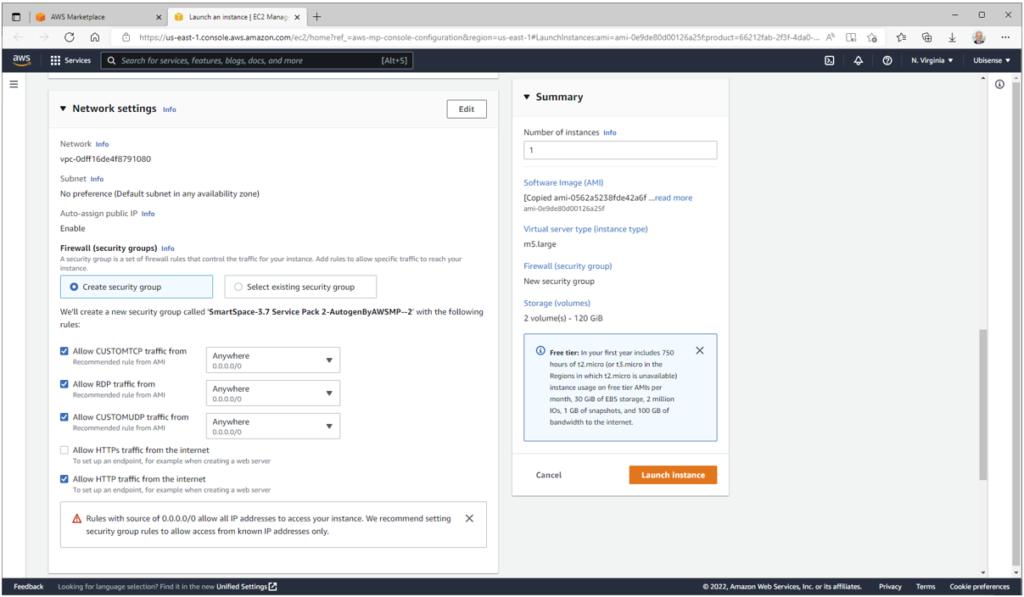
Then apply the security group that is recommended for this AMI. The launch interface does not show the ports covered by the rules; the full details are as follows:

Access on port 8443 is for remote desktop access via the NICE/DCV protocol; port 3389 is for remote desktop access via Windows Remote Desktop protocol; port 80 is for external HTTP access to the SmartSpace web site. Note that at this point you could choose to disable either NICE DCV or RDP and you could limit the access to known IP addresses, but if you modify the rules incorrectly you may make it impossible to access the appliance. It is possible to change the security group at any point after starting the instance, so we recommend just using the recommended setting to start with and then tightening up access control later:
At the stage we recommend that you don’t make any other changes to the instance specification, but just invoke ‘Launch instance’.
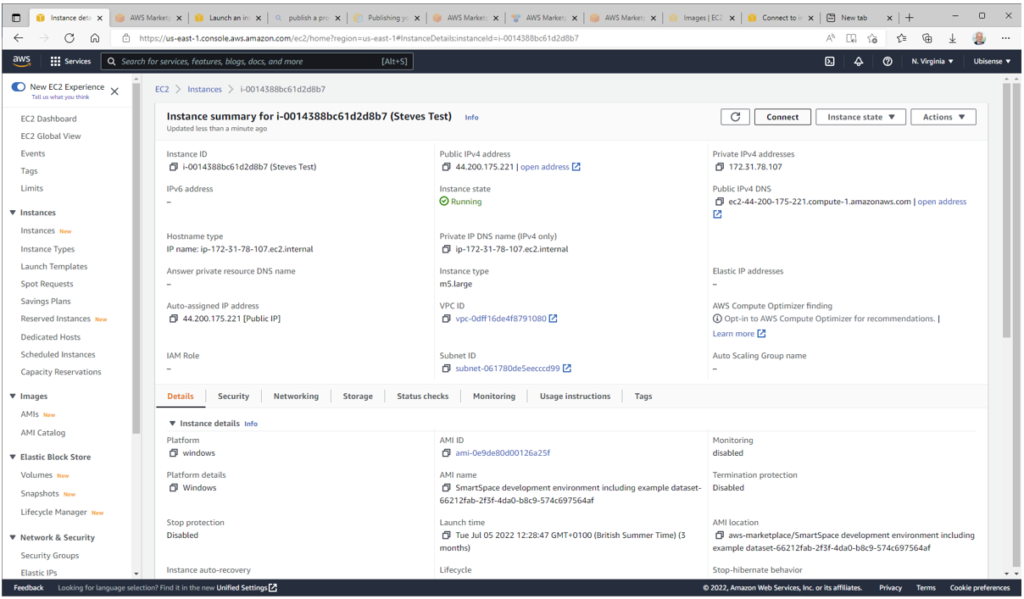
This will start up a new EC2 instance. After initial startup, the Windows OS will perform some initialisation tasks, which will take a few minutes. At the end of this process, the OS will generate a new random password. You will then be able to access the instance by selecting it and pressing the ‘Connect’ button:
This will take you to the normal connection screen, where you should select the RDP client tab:

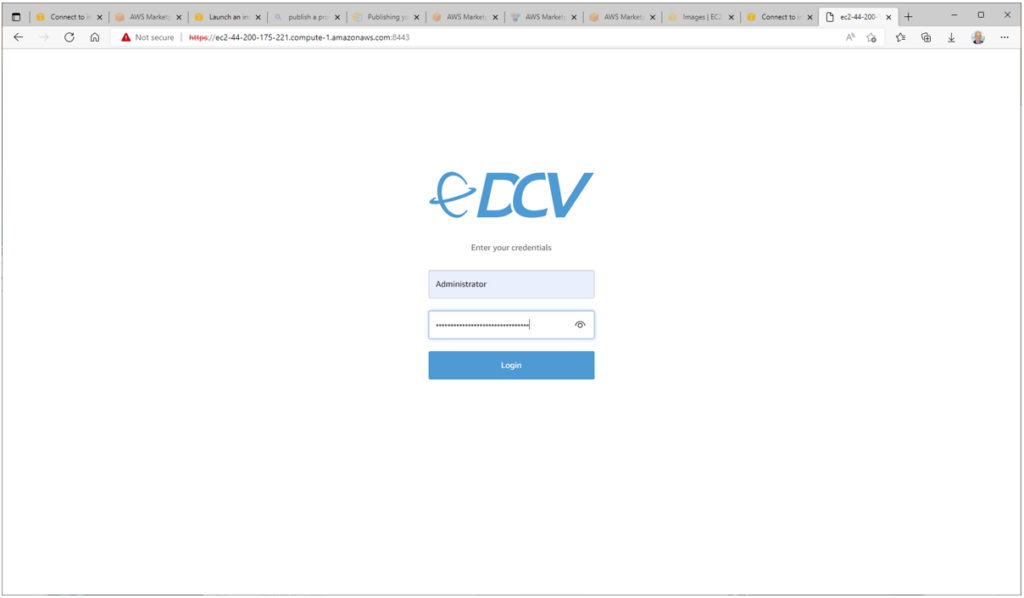
Press the ‘Get password’ button to retrieve your password. You can then connect to the machine using RDP or NICE DCV, using the Administrator user, as shown below:

Logging in and acquiring the BYOL license
When you connect to your AWS instance using either RDP or NICE DCV protocols, you will see this desktop (depending on your choice of access protocol, you may see a different desktop background – this is not a problem):
The key tasks are linked to by shortcuts on the left-hand side of the desktop.
Get license reference
Follow the top shortcut to register your product with Ubisense to receive a BYOL license reference:
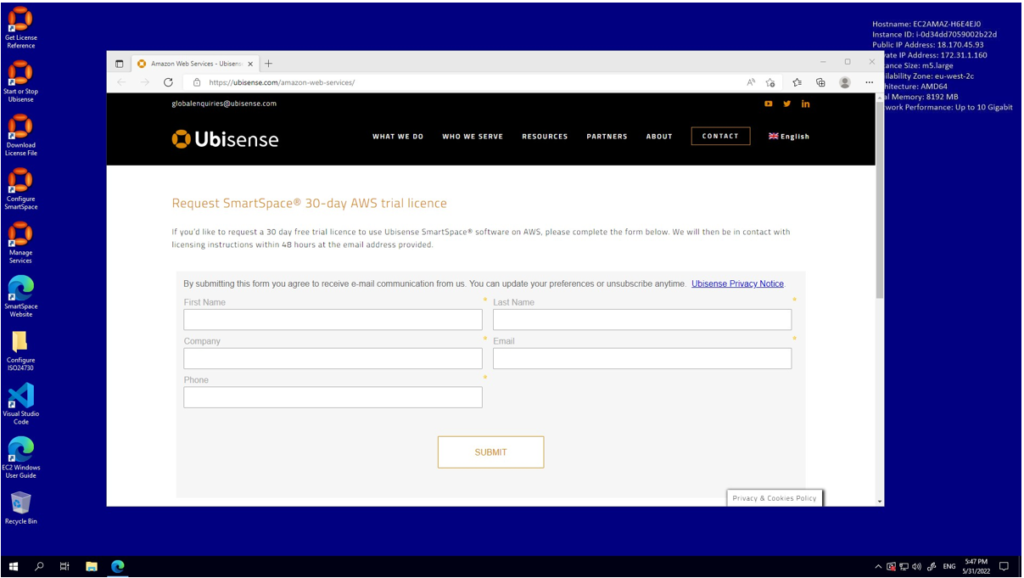
After you complete the form you will receive a reference code for your license, sent to the email address you have registered.
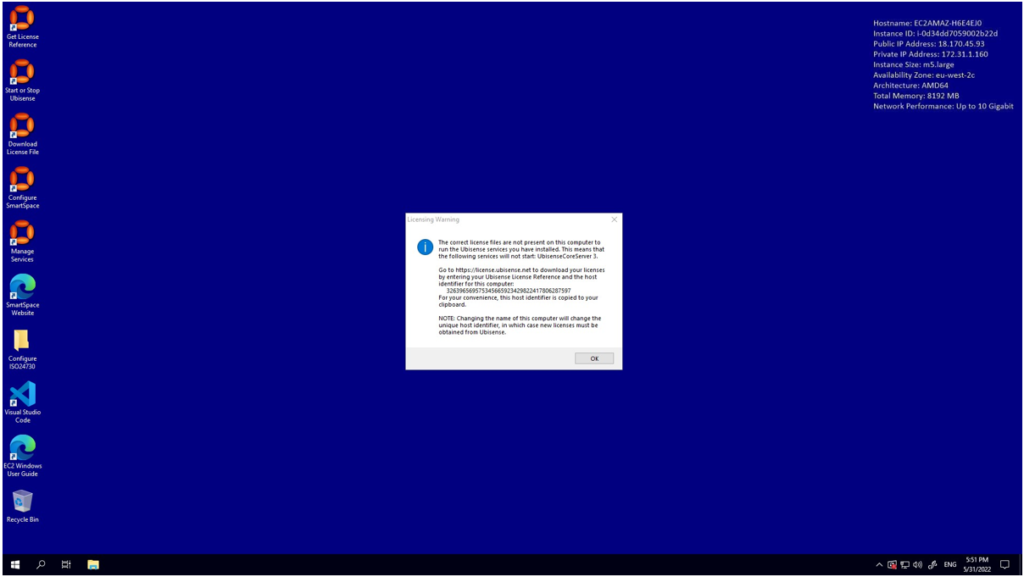
Start the Ubisense platform to find your machine id
Follow the ‘Start or Stop Ubisense’ link to start the Ubisense platform. The first time you do this you will see this licensing warning, confirming that the instance id has been copied to your clipboard:
Download license file
Follow the ‘Download License File’ link to the SmartSpace License Package service:
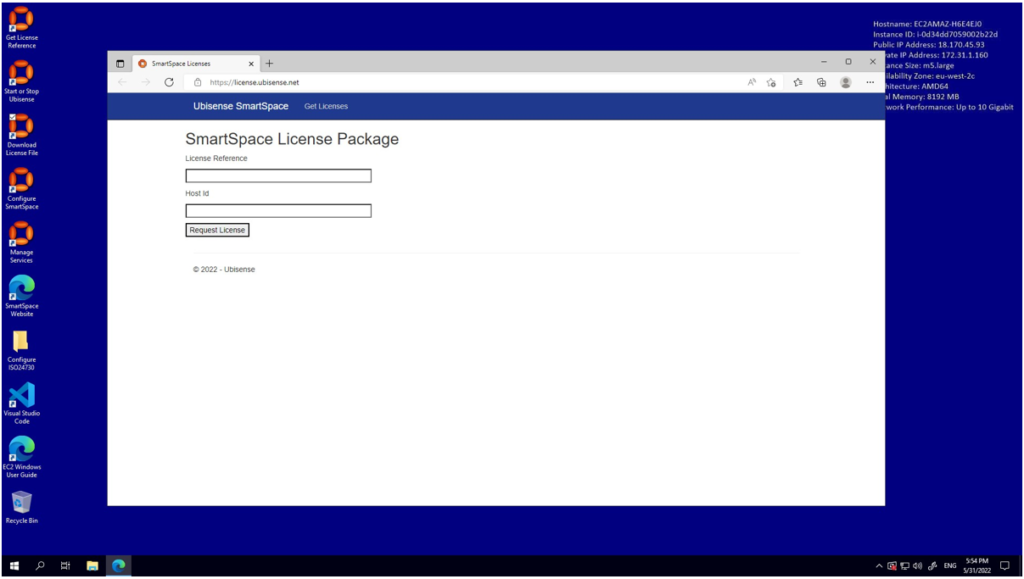
Enter your machine id first (by pasting it) into the second text box. Then enter the license reference code from the email you received in the first text box. Pressing the Request License button will cause a zip file containing an installer MSI to be download to your machine; unzip the zip file and run the MSI to install your licenses.
Start the Ubisense platform
If you quit the Ubisense Platform Control program then follow the ‘Start or Stop Ubisense’ link again, and select each service and press ‘Start’ for each:
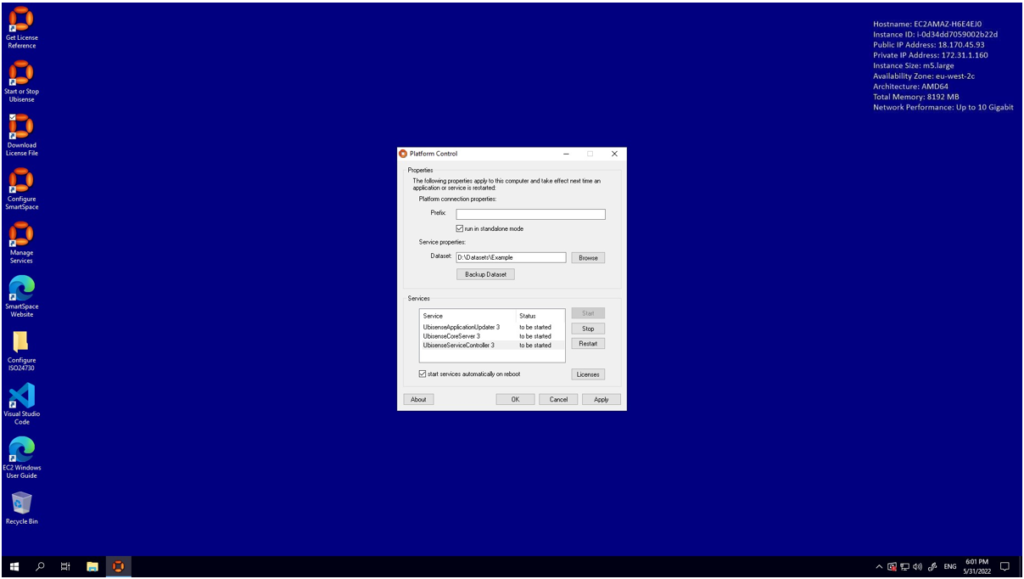
Clicking ‘Apply’ will change the state of each service from ‘to be started’ to ‘running’.
Start the SmartSpace Configuration tool
Follow the ‘Configure SmartSpace’ link to start the SmartSpace Configuration tool. This will display the configuration interface for SmartSpace, initially with no topic selected:
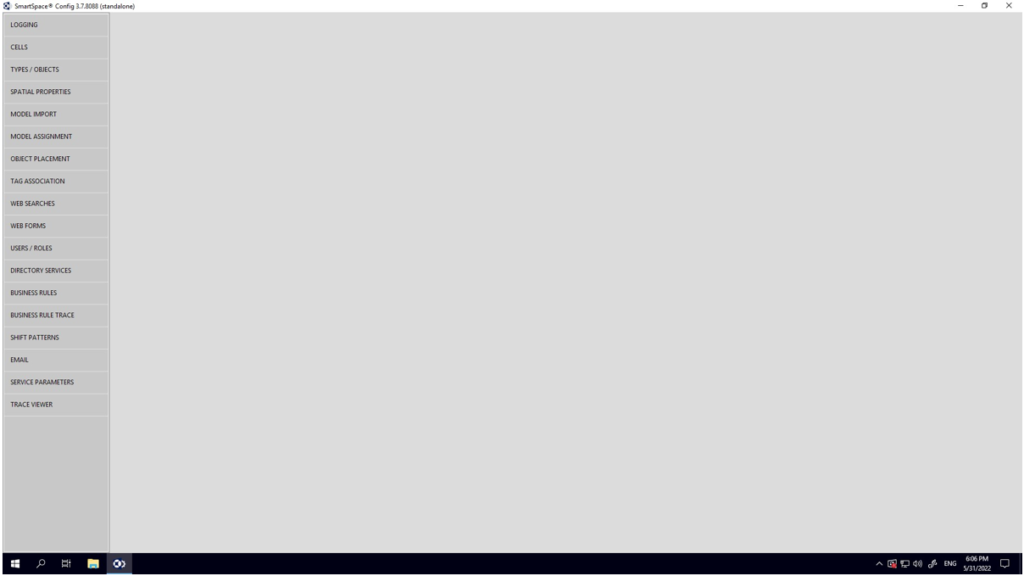
Clicking on any of the topics in the task bar will bring up the relevant UI for that topic.
Browse the example dataset
Your SmartSpace AWS Environment is configured with a simple example dataset, showing some of the key features of SmartSpace. The example has a simple data model, which includes Asset and Container types, with the Container type having subtypes Workspace and Trolley; some business rules count the number of assets in each container and register warning and error states when this exceeds a threshold; a search configuration creates a zero-code map UI that shows the containers and assets with colour coded numbers representing the count of assets in each container; finally the RTLS integration is configured to import live data from an external location source.
Online documentation is available at Ubisense SmartSpace, explaining in detail how to configure a SmartSpace application.
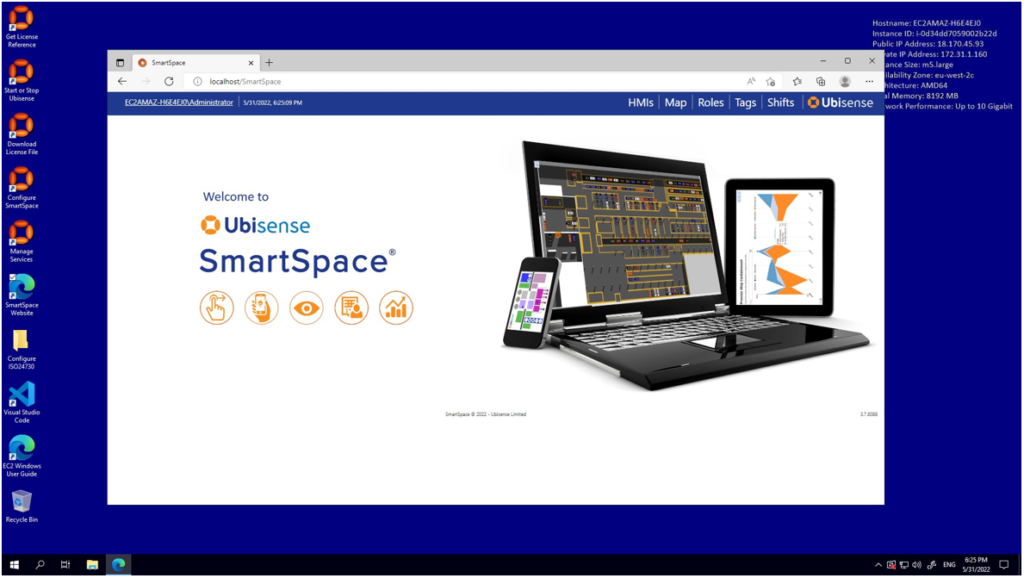
Visit your example dataset’s SmartSpace website
Follow the ‘SmartSpace Website’ link and login as Administrator using the link at the top-left of the page. This will normally happen automatically on the local machine, and you will see this screen:
You can also connect over the public internet (if you configured your instance to support public internet access) using the public address of your instance with the username/password for the Administrator user on your machine (you can set up other users via the SmartSpace USERS/ROLES configuration page or using the Web UI via the Roles tab, and you can integrate with LDAP directory services using the DIRECTORY SERVICES page if desired). Clicking on the ‘Map’ tab will display the simple zero-code application described above:
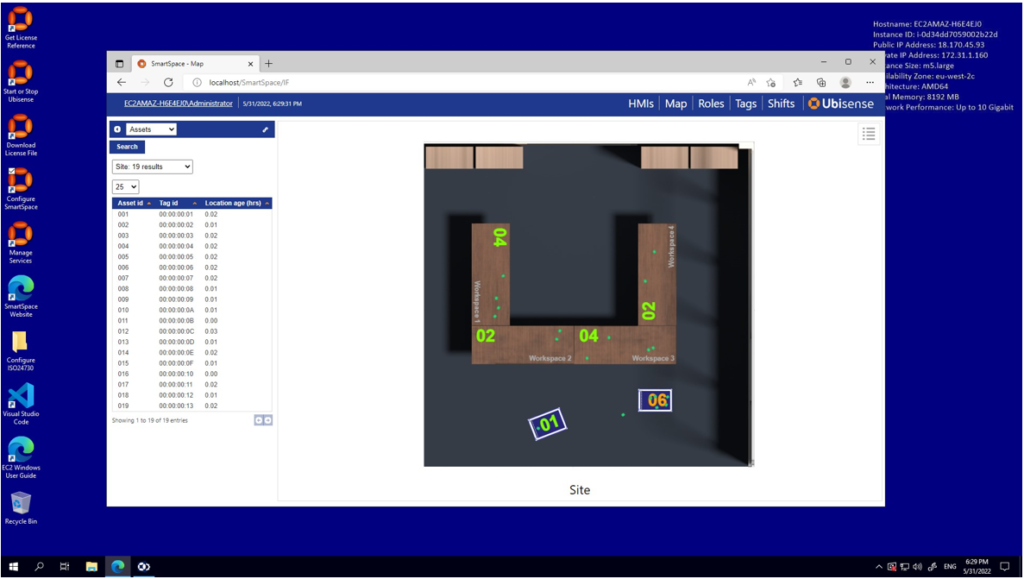
You will see the asset objects moving in response to the location data stream and the counts updating to reflect the number of assets in each container. The map supports searching for individual assets by name, and selecting assets or containers to view their details.